Thursday, December 15, 2011

Holy Cow!  The Clearance Blitz is ON!!! Check out these great deals in my store before they are all gone forever!


Monday, November 21, 2011

Online Extravaganza Starts TODAY!


CLICK HERE to check out all the amazing deals available!!!

NOTE:  You will not see the sale price for an item until you actually click on it!


Sunday, June 26, 2011

June Club Project

This was our last club before I took my "baby hiatus", so I decided to go all out!!!  I gave my hostess club members a choice of three different stationary box sets to make:

Choice #1 used the Woodland Walk DSP & Coordinating Colors:

Choice #2 used the Love Letter DSP & Coordinating Colors:

Choice #3 used the Elegant Soiree & Coordinating Colors:

When folded up, the boxes looked like so:


And each box contained 4 different card designs and 4 mini notecards:


Here is a link to the tutorial I put together for the workshop!  
It is very easy to adapt to any other DSP collection!

Everyone did such a wonderful job on their projects... I am going to miss all my lovely stampin' gals while I take my little break!  I'll see all you beauties when we start back up again next year!!! :o)


Sunday, May 29, 2011

May Club Project - Father's Day

For my May hostess club, we focused on Father's Day and National Scrapbooking month to make these great accordion-style mini albums!


Here is a great tutorial on how to make the basic album.  What I love about this album, it you can expand it to be as large as you want it to be by simply adding more folded square pieces!


We embellished ours with the following supplies:
Nautical Expedition DSP (Summer Mini) & coordinating Card stock/Ink
The Open Sea Stamp Set (Summer Mini)


Monday, May 2, 2011

Sympathy Card

I made this card for a very good friend of mine.  It uses two of my favorite punches, Bird Punch and Decorative Label!


The stamp sets used were Thoughts & Prayers and the hostess set, Punch Potpourri from the 2010/11 IB&C.


Sunday, April 24, 2011

April Club Projects - Mother's Day

We did some great Mother's Day projects for our May hostess club!

First, we had some fun with acetate and made these awesomely simple pentagon treat tubes!  I absolutely love working with acetate for treat boxes, because it makes choosing the treat for the inside so much fun!


Click here for a tutorial on SCS on how to make these goodies!

Secondly, we made a lovely collapsible card where we utilized the dryer sheet technique on the front:


We used the Word Play stamp set as well as the "Something to Celebrate" hostess set and "Easter Blossoms" stamp set from the Occasions mini.  


I designed the card to write a childhood memory on the middle circle (hence, the "Remember When..." on the front of the card) :o)


Monday, March 28, 2011

March Club Projects

Here are the projects we made in our March hostess club!

We made an awesome Spring-themed card using a patterned paper quilt technique with the Big Shot:


Simply punch out your desired patterned paper pieces with a square punch (we used the 1-1/4" Square punch, which worked perfectly for the 5-1/2" x 4-1/4" card), adhere the pieces to a piece of card stock with matching dimensions for your "quilt" pieces, and then run it through your big shot using an embossing folder or texture plate.  We used the Finial Press Textured Impressions Embossing Folder for our project.

These Easter carrot boxes are made using the Petal Cone Big Shot die and the Perfect Details Texturz Plate for the waffle cone effect:


The "leaves" were made using the Build-a-Blossom stamp set and coordinating Blossom Petals XL Punch.


Saturday, March 12, 2011

February Club Projects

Well, here are the projects from last month's club!  I challenged my gals a bit and we did 3 cards and 1 3D project - and they did great! Everyone left on-time with a handful of beautiful cards!

First, we made 3 identically designed cards in 3 different monochrome schemes:  Baja Breeze, Rose Red and Pear Pizazz.  


The simple but very elegant design featured my favorite Sale-a-Bration set, "Bliss" as well as our new "Framed Tulips" embossing folder, the newest shades of the seam binding ribbon and the oh-so-versatile "First Edition" Designer Series Paper - all from the Occasions Mini Catalog!

If you want to get your hands on the free "Bliss" Stamp set (or any other Sale-a-Bration set, for that matter) you better hurry!  Sale-a-Bration ends March 31!  Just click here for more info or here to view the SAB brochure!


To color the DSP and add a beautiful shimmer, we used three custom Smooch colors I made before class in Baja Breeze, Rose Red, and Pear Pizazz.  They were a perfect match!  Click here to see my tutorial on how to create your very own custom Smooch colors!

Lastly, we made a quick and easy little treat box for St. Patrick's Day using the Bitty Box & Envelope XL Die for the Big Shot and the Perfect Polka Dots embossing folder.  The stamp is the a-la-carte stamp "Lucky Shamrock" from the Occasions Mini.


When using embossing folders and dies together, you should cut your item with the die first, and then run it through with the embossing folder second. If the item doesn't fit completely in the embossing folder, that's OK!  Just run it through a section at a time, making sure (if possible) to put the edge of the embossing folder along a score line of your project.  If that is not possible, try to work with a simple pattern (like the polka dots   that is easy to match up.

This treat box is perfect for the mini Reese's peanut butter cups, because it fits four of them just right! 


For our little shamrocks on top, we just stamped the Lucky Shamrock stamp 4 times and punched only the shamrock out using the 1" circle punch.


Friday, March 11, 2011

Happy News + January Club Projects

Hello All! Wow... it sure has been a long time!  Well, over the holidays DH and I found out we are expecting baby #2!  This was most welcome and prayed about news - we could not be more excited and happy!  Unfortunately, my body did not take the news so well and I had a very exhausting and queasy first trimester.  And instead of "morning sickness" I had a daily and consistent case of "afternoon and evening sickness."  This did not bode well for my stamping productivity, as the evenings are my time for stamping and creating.

Well, long story short... my poor blog suffered the consequences - hence the lack of posting lately.  So, here I am - finally into my second trimester and my energy is on the rebound!  So I'm taking a little time to get caught up and get up my pics for my last 2 months of clubs!

First, I'm going to post January's projects, where we had lots of fun making Valentine's day projects and playing with bubbles!

Yes, that's right!  Bubbles!  The card we made featured an awesome technique I learned at the St. George regionals last September, and I had been dying to use it!


This was so much fun to do, and all it required was a bowl, a straw, some bubble solution and some Stampin' Up! classic ink refill!  Simply mix the bubble solution and your ink in a bowl, stick the straw in and blow some bubbles!  Once the bubbles rise above the lip of the bowl, touch your card stock piece onto the bubbles and a beautiful pattern will appear! Click Here to see a great tutorial video for this technique put together by fellow demo, Dawn Olchefske!


To add a little extra pizzaz to our card, we sprayed a bit of Vanilla Shimmer Smooch on top! The stamp set used on the card was the "Filled With Love" set available from the Holiday mini and during the Filled With Love promo.  We finished off our card with some Basis Black satin ribbon, some of the new pom pom trim (from the Occasions mini) and some lovely rhinestones!

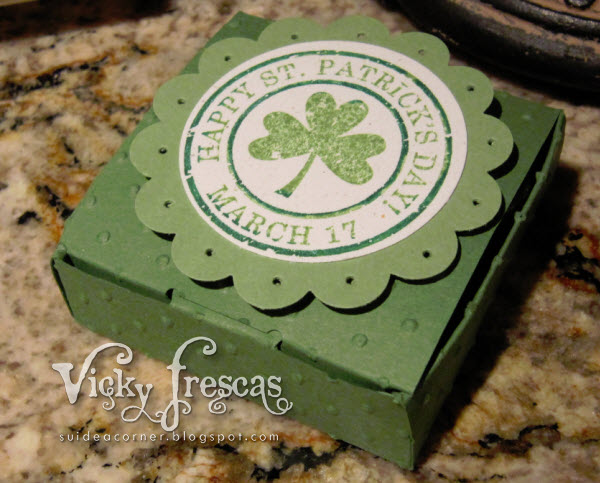
Our second project was another one I had been itching to try in one of my workshops.  I received a version of this gorgeous treat box during my trip to Founder's Circle last September.  I instantly fell in love with the idea and knew it would fit in perfect for the V-Day theme, but at the same time also work great for any other occasion.


This adorable treat box uses the Perfect Setting XL Die for the Big Shot.  When you flip open teh top (made from the 2-1/2" circle punch), you can place a cupcake liner and your treat or gift inside!


The key to getting the size just right, so your cupcake liner doesn't fall out of the bottom, is to overlap the ends by one scallop when putting the cupcake piece together:


For our treat holders, we used a simple but lovely color scheme of Crumb Cake and Pretty in Pink.  The stamp set is "Valentine Defined" from the Occasions Mini Catalog.


Thursday, January 27, 2011

"Love" Mini Album Class!

Hello everyone!  Just wanted to pass on this great opportunity!  One of my recruits, Michelle Walker, is having her very first class on how to make a mini album for Valentine’s Day!  The class will be held on Saturday, February 5th from 12-4!


This is one absolutely gorgeous album with some amazing techniques… I can’t wait to learn how to make those flowers!  And what a great opportunity to create a very special handmade gift for that special someone on Valentine’s Day!

All information on the class can be found here on the the class flyer.  Please contact Michelle directly if you would like to attend!

Hope to see you there! :o)


Search My Blog